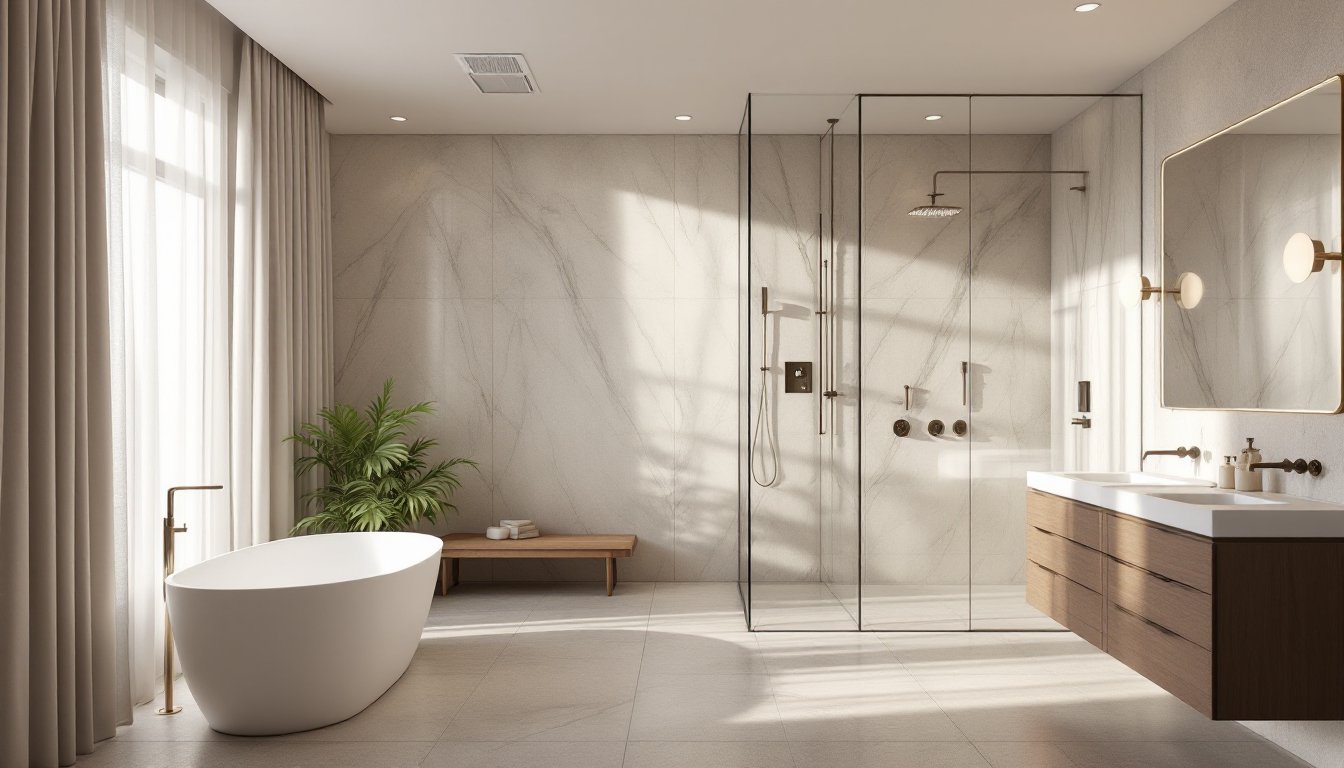
A spa bathroom isn’t about magazine-perfect styling, it’s about creating a space where you can actually unwind after a long day. Whether you’re gutting a dated 1990s master bath or upgrading fixtures in a builder-grade layout, the right combination of materials, water features, and lighting can turn a functional room into a personal retreat. This guide walks through the practical decisions that define a luxury spa bathroom: tub selection, shower systems, finishes, lighting strategy, and storage. These aren’t cosmetic tweaks, they’re structural and mechanical choices that require planning, often permits, and sometimes a licensed plumber or electrician.
Table of Contents
ToggleKey Takeaways
- A true luxury spa bathroom balances three core elements: water delivery (soaking tubs, multi-head showers, steam generators), quality materials (natural stone, large-format porcelain, engineered quartz), and sensory control (heated floors, dimmable lighting, properly sized exhaust fans).
- Freestanding soaking tubs require structural assessment—confirm floor joist capacity before installation, as a full tub can exceed 800 pounds, and verify your water heater can support the fill volume (a 60-gallon tub may drain a standard 40-gallon tank completely).
- Premium shower systems with multiple water sources (rain heads, body sprays, handheld wands) demand 8–12 GPM total flow and require thermostatic valves to prevent scalding and pressure drops; minimum water pressure of 45 PSI is essential for optimal performance.
- Large-format tiles (12×24 or larger) and honed or textured finishes with a DCOF rating of 0.42+ minimize maintenance and prevent slipping in wet areas—avoid polished marble in shower floors despite its elegant appearance.
- Layered lighting with dimmable controls, vertical vanity sconces at 60–66 inches, and accent lighting (LED strips, backlit mirrors) create spa ambiance while task lighting eliminates shadows; all fixtures in wet zones must be IP65-rated or higher.
- Clutter-free spa design relies on built-in storage solutions like recessed shower niches, soft-close vanity drawers, and a properly sized exhaust fan (minimum 1 CFM per square foot) to prevent mold and maintain the serene environment.
Essential Elements of a Luxury Spa Bathroom
A true spa bathroom balances three core elements: water delivery, material quality, and sensory control. Start with water. Soaking tubs, multi-head showers, and steam generators all demand upgraded plumbing, typically 1/2-inch or 3/4-inch supply lines depending on flow rate. Check your home’s water heater capacity: a 60-gallon freestanding tub can drain a standard 40-gallon tank in one fill.
Next, consider surfaces. Natural stone, large-format porcelain, and engineered quartz dominate high-end installs because they handle moisture without frequent resealing. Skip porous materials like unsealed marble in wet zones unless you’re committed to annual maintenance.
Finally, control the environment. Heated floors (electric or hydronic), dimmable LED lighting, and a properly sized exhaust fan (minimum 1 CFM per square foot of floor space) prevent mold and keep the space comfortable year-round. If adding a steam shower, factor in waterproof membranes and sloped ceilings to prevent drip-back. Many jurisdictions require a dedicated 20-amp circuit for steam generators, confirm local electrical codes before rough-in.
Choosing the Perfect Soaking Tub or Whirlpool
Freestanding tubs anchor luxury bathrooms, but they’re not one-size-fits-all. Standard alcove tubs hold 40–50 gallons: freestanding models range from 60 to 90 gallons. Measure your floor joist spacing and confirm load-bearing capacity, a full tub can exceed 800 pounds. Older homes with 2×8 joists on 16-inch centers may need reinforcement.
Material options:
- Acrylic: Lightweight, retains heat well, affordable. Prone to surface scratches over time.
- Cast iron with enamel: Extremely durable, holds heat longer than acrylic. Weighs 300–500 pounds empty, requires structural assessment.
- Stone resin or solid surface: Mid-weight, excellent heat retention, matte finish resists soap scum. Higher cost than acrylic.
Whirlpool jets add hydrotherapy but complicate cleaning. Ensure access panels for pump service, most codes require it. Air baths (which use air jets instead of water recirculation) stay cleaner but offer less vigorous massage. If going with a whirlpool, specify self-cleaning or purge cycles to prevent biofilm buildup in the lines.
Placement matters. Freestanding tubs need floor-mounted or wall-mounted fillers: deck-mounted options work for drop-in alcove styles. Rough-in the drain and supply before setting the tub, you can’t easily adjust afterward.
Premium Shower Systems and Rain Heads
Luxury showers layer multiple water sources: overhead rain head, handheld wand, body sprays, and sometimes a bench with a steam outlet. This setup can demand 8–12 GPM total flow, well above a standard single-head shower’s 2.5 GPM. Install a thermostatic valve with volume controls for each outlet to prevent scalding and pressure drops when someone flushes a toilet.
Rain heads mounted in the ceiling (12-inch or larger) deliver a gentle, immersive flow but require adequate water pressure, minimum 45 PSI at the fixture. If your home’s pressure is below that, consider a shower pump. Wall-mounted rain arms work in homes where cutting into the ceiling isn’t feasible.
Body sprays should be positioned at shoulder and mid-torso height, spaced roughly 8 inches apart vertically. Aim them slightly downward to avoid spraying the shower door. Most building codes allow up to six sprays without a pressure-balancing requirement, but thermostatic valves are safer.
Tile and waterproofing: Use a bonded waterproof membrane (like Schluter KERDI or RedGard) over cement board before tiling. Slope the shower floor 1/4 inch per foot toward the drain. Large-format tiles (12×24 or larger) minimize grout lines and speed cleaning, but they require a perfectly flat substrate, use self-leveling underlayment if needed.
Safety note: Non-slip tile or textured stone is essential for shower floors. Polished marble looks elegant but becomes dangerously slick when wet. Choose honed or textured finishes with a DCOF (Dynamic Coefficient of Friction) rating of 0.42 or higher for wet areas.
Luxurious Materials and Finishes That Elevate Your Design
Material selection defines the spa aesthetic more than any single fixture. Porcelain slab in marble or stone looks has mostly replaced natural stone in high-end remodels, it’s non-porous, consistent in color, and available in 5×10-foot sheets that minimize seams. For walls, consider full-height installation to eliminate the traditional tile-to-paint transition.
If using natural stone, seal it properly. Honed marble and limestone need penetrating sealers reapplied every 12–18 months in wet areas. Granite and quartzite are denser and more stain-resistant. Avoid travertine in steam showers, it’s too porous.
For countertops and vanity tops, engineered quartz outperforms marble in moisture resistance and doesn’t require sealing. It’s available in veined patterns that mimic Calacatta or Carrara at a fraction of the cost and maintenance.
Wood accents (teak benches, cedar sauna panels, walnut vanities) add warmth but must be treated. Use marine-grade or exterior sealers and ensure proper ventilation. Teak naturally resists rot, but even it benefits from annual oiling. Avoid MDF or particleboard cores in humid environments, they swell and delaminate.
Fixture finishes:
- Matte black and brushed gold dominate 2026 trends but show water spots. Plan to wipe down after use.
- Brushed nickel and chrome hide spots better and resist corrosion in steam environments.
- Match metal finishes across faucets, towel bars, and lighting for visual cohesion.
Integrating luxury interior design principles helps maintain visual consistency throughout the home.
Lighting and Ambiance for Ultimate Relaxation
Layered lighting transforms a bathroom from sterile to serene. Start with task lighting at the vanity: vertical sconces flanking the mirror at 60–66 inches above the finished floor eliminate shadows under the eyes. Use LED bulbs rated 2700–3000K for warm, flattering light. Avoid overhead-only lighting, it casts harsh shadows.
Add ambient lighting with recessed cans or a central pendant. Dimmable controls are non-negotiable. Install a low-voltage dimmer compatible with LED loads, standard incandescent dimmers cause LED flicker.
Accent lighting highlights architectural features: LED strip under a floating vanity, backlit mirrors, or in-shower niche lighting. Use IP65-rated or higher fixtures in wet zones (shower enclosures, above tubs). Most LED strips designed for bathrooms are low-voltage (12V or 24V) and require a transformer housed outside the wet area.
For a true spa vibe, consider a separate nightlight circuit with motion sensors, useful for middle-of-the-night visits without full brightness. Smart switches or scene controllers let you program “relaxation” and “grooming” modes.
Some designers drawing inspiration from modern spa renovations layer candlelight or dimmable wall sconces to create multiple mood options.
Electrical notes: Bathroom circuits must be GFCI-protected per NEC code. If adding heated floors, a steam generator, or multiple high-wattage fixtures, you may need additional circuits. Hire a licensed electrician for anything beyond fixture replacement, water and electricity are an unforgiving combination.
Smart Storage Solutions and Spa-Worthy Accessories
Clutter kills the spa vibe. Built-in storage keeps countertops clear. Recessed niches in shower walls (framed during rough-in, not cut into finished tile) hold shampoo and soap without protruding shelves. Standard niche depth is 3.5 inches (one stud bay), but you can go deeper if framing allows.
Vanities should include a mix of drawers and pullout shelves, drawers for small items, shelves for towels and toilet paper. Soft-close hardware is worth the upcharge: slamming drawers disrupt the calm. If space allows, a linen tower or floor-to-ceiling cabinetry maximizes vertical storage.
Medicine cabinets can be recessed between studs (typically 14.5 inches wide for 16-inch on-center framing) or surface-mounted. Mirrored fronts double as task lighting reflectors.
Accessories matter:
- Heated towel racks (hardwired or plug-in) keep towels dry and warm. Hardwired models need a dedicated circuit.
- Rainfall showerheads and handheld wands on slide bars offer flexibility.
- Teak or bamboo bath mats prevent slipping and add natural texture. Let them dry fully between uses.
- Waterproof Bluetooth speakers (IP67-rated) or in-ceiling moisture-resistant speakers let you play ambient soundscapes.
Platforms like Houzz and Homify showcase thousands of real-world storage layouts worth browsing before finalizing your design.
Ventilation is storage’s silent partner. An undersized exhaust fan (or worse, none) leads to mold in cabinets and on towels. Size your fan for 1 CFM per square foot minimum, or follow the air changes per hour method if the bathroom has high ceilings. Duct the exhaust to the exterior, never into an attic.
Conclusion
Building a luxury spa bathroom means making deliberate choices about plumbing, materials, lighting, and storage, not just picking pretty fixtures. Plan for adequate water supply and drainage, confirm structural loads for heavy tubs, and hire licensed pros for electrical and plumbing rough-in. With careful planning and quality materials, a spa bathroom becomes the most-used upgrade in the home.